 APPS
APPS
 APPS
APPS
 APPS
APPS
Following a nearly one-year preview of its business-focused video service, Microsoft Corp. has announced the general availability of Stream.
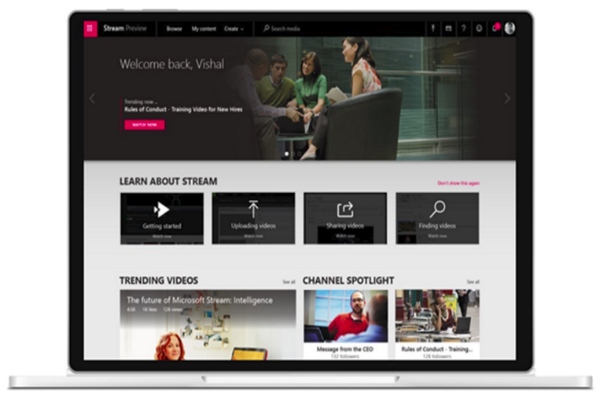
Microsoft has added new features to the video service, which will ultimately replace Office 365 Video, including a revamped homepage with machine learning-powered search features, integration with Office 365 Groups and more.
Here’s a look at how to get started with Microsoft Stream, including uploading videos together with video permissions and how to use Stream in other apps:
Microsoft Stream is included in Office 365 Education and Enterprise plans. For users that currently use Office 365 Video, Microsoft will start migrating users to Stream on an opt-in basis from the second half of 2017.
Alternatively, if a user doesn’t have one of these Office 365 plans they can sign up for the standalone Microsoft Stream plan, available in two options. The standalone plans come with a 90-day free trial.
Microsoft Stream is available on desktops, Macs and iOS, Android and Windows mobile devices. When watching a video on Stream, the platform will use adaptive bitrate streaming to provide you with the best viewing experience based on your available bandwidth.
To get started with Microsoft Stream you can click the “Stream” tile in the Office 365 App Launcher. Alternatively, you can sign-in or sign-up for the free trial on stream.microsoft.com.
On the homepage of Stream, you will have access to Trending videos, tutorial videos on how to use Stream, your watchlist (if you have added videos to watch later) and the channels you follow.
When you invite coworkers to Stream they will be able to view all the video content that has been uploaded (based on the video’s permissions) as well as upload their own videos.
In the Microsoft Stream navigation bar, click the “invite” (person with a plus sign) icon > search for a coworker or group to invite. If your organization uses Azure Active directory you can search using their names or type in an email address that belongs to the same domain as you. Once you have added your various coworkers, click Invite.
To upload videos to Microsoft Stream you can use the upload button at the top of any of the pages or simply drag and drop any video to any group or channel. Currently, you can only upload existing videos to Microsoft Stream, but live streaming capabilities are planned for a future release.
While the video is uploading you can edit the metadata to make it easier to find the video. Details that you can add include a title and description (including time codes, hashtags and links) for your video, language spoken in the video, thumbnail for the video, video permissions, etc.
Once your video has uploaded and you have completed the metadata, click the “Publish now” button at the bottom of the upload card.
With video permissions, you can decide who can see your video, who can own and edit it and where it displays (channels and groups).
![]()
If you want everyone in your organization to view your video, simply check the tickbox at the top of the permissions section.
Alternatively, you can select to share your video with specific groups, channels and individual people. Any group or person added will automatically be given view status and you can select whether you want them to be an owner, which will give them the right to edit the settings, delete and share it in other groups and channels.
To add a Microsoft Stream channel or video to a tab in Teams, copy the channel or video’s URL from Stream. In Teams, select the plus icon in your Team channel > select the Stream tab > in the direct link section paste the URL > click Save.
You can also share your videos from Stream to Yammer, Microsoft’s enterprise social network service.
In Microsoft Stream, select the Share button from the video page > in the dialog box add a message and people/groups that you want to notify > click Post and your video will share directly in the Yammer thread. Alternatively, you can copy and paste the video’s URL directly into a Yammer thread.
To embed your Microsoft Stream channels and videos into your SharePoint sites, copy the channel or video’s URL from Stream. In SharePoint Online, click the plus icon to add a web part to the page > select Microsoft Stream > select whether the source is a channel or video > paste the URL > select Publish.
To embed Microsoft Stream channels and videos into your OneNote page, copy the channel or video’s URL from Stream. On the OneNote page where you want your video, paste the URL and the video will display.
Source: Microsoft Stream
Support our mission to keep content open and free by engaging with theCUBE community. Join theCUBE’s Alumni Trust Network, where technology leaders connect, share intelligence and create opportunities.
Founded by tech visionaries John Furrier and Dave Vellante, SiliconANGLE Media has built a dynamic ecosystem of industry-leading digital media brands that reach 15+ million elite tech professionals. Our new proprietary theCUBE AI Video Cloud is breaking ground in audience interaction, leveraging theCUBEai.com neural network to help technology companies make data-driven decisions and stay at the forefront of industry conversations.