


 NEWS
NEWS
NEWS
NEWS
NEWS
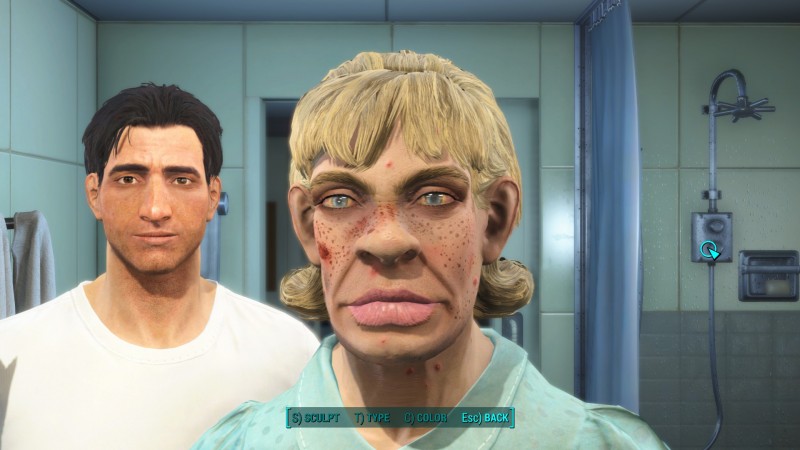
While making a hilariously disgusting character is fairly easy in Fallout 4, making a character that actually looks good is a bit more difficult. Once Bethesda Game Studios finally releases modding tools for the game, we might see some mods that make the face-sculpting tools a little more user friendly, but until then, here are a few tips on how to make a character that actually looks like they were on the right side of the vault door when the bombs dropped.
If you want a list of the facial features I chose for my character, I have include one at the end.
As with its previous role-playing games, Bethesda was kind enough to offer a number of character presets that already look pretty decent on their own. One of the easiest ways to get the look you want is to choose the preset that most closely matches your vision and then alter it until you are satisfied. Like Michelangelo (the Renaissance artist, not the Ninja Turtle), you want to use the sculpting tools to “chip away everything that doesn’t look like David,” so if you start from something that already kind of looks like David (or whoever), then you’ll have less work to do.
In my example, I’m using the default “Face 01” female character preset. Before I change anything, I start out by going into the Extras menu and choose the option to remove all makeup, blemishes, and so on so I can start with a clean slate.
Note: My advice is the same for creating a male character, but you’ll have a few different options, such as facial hair.
This could be personal preference, but I have found that working from top to bottom is the best way to get the face I want.
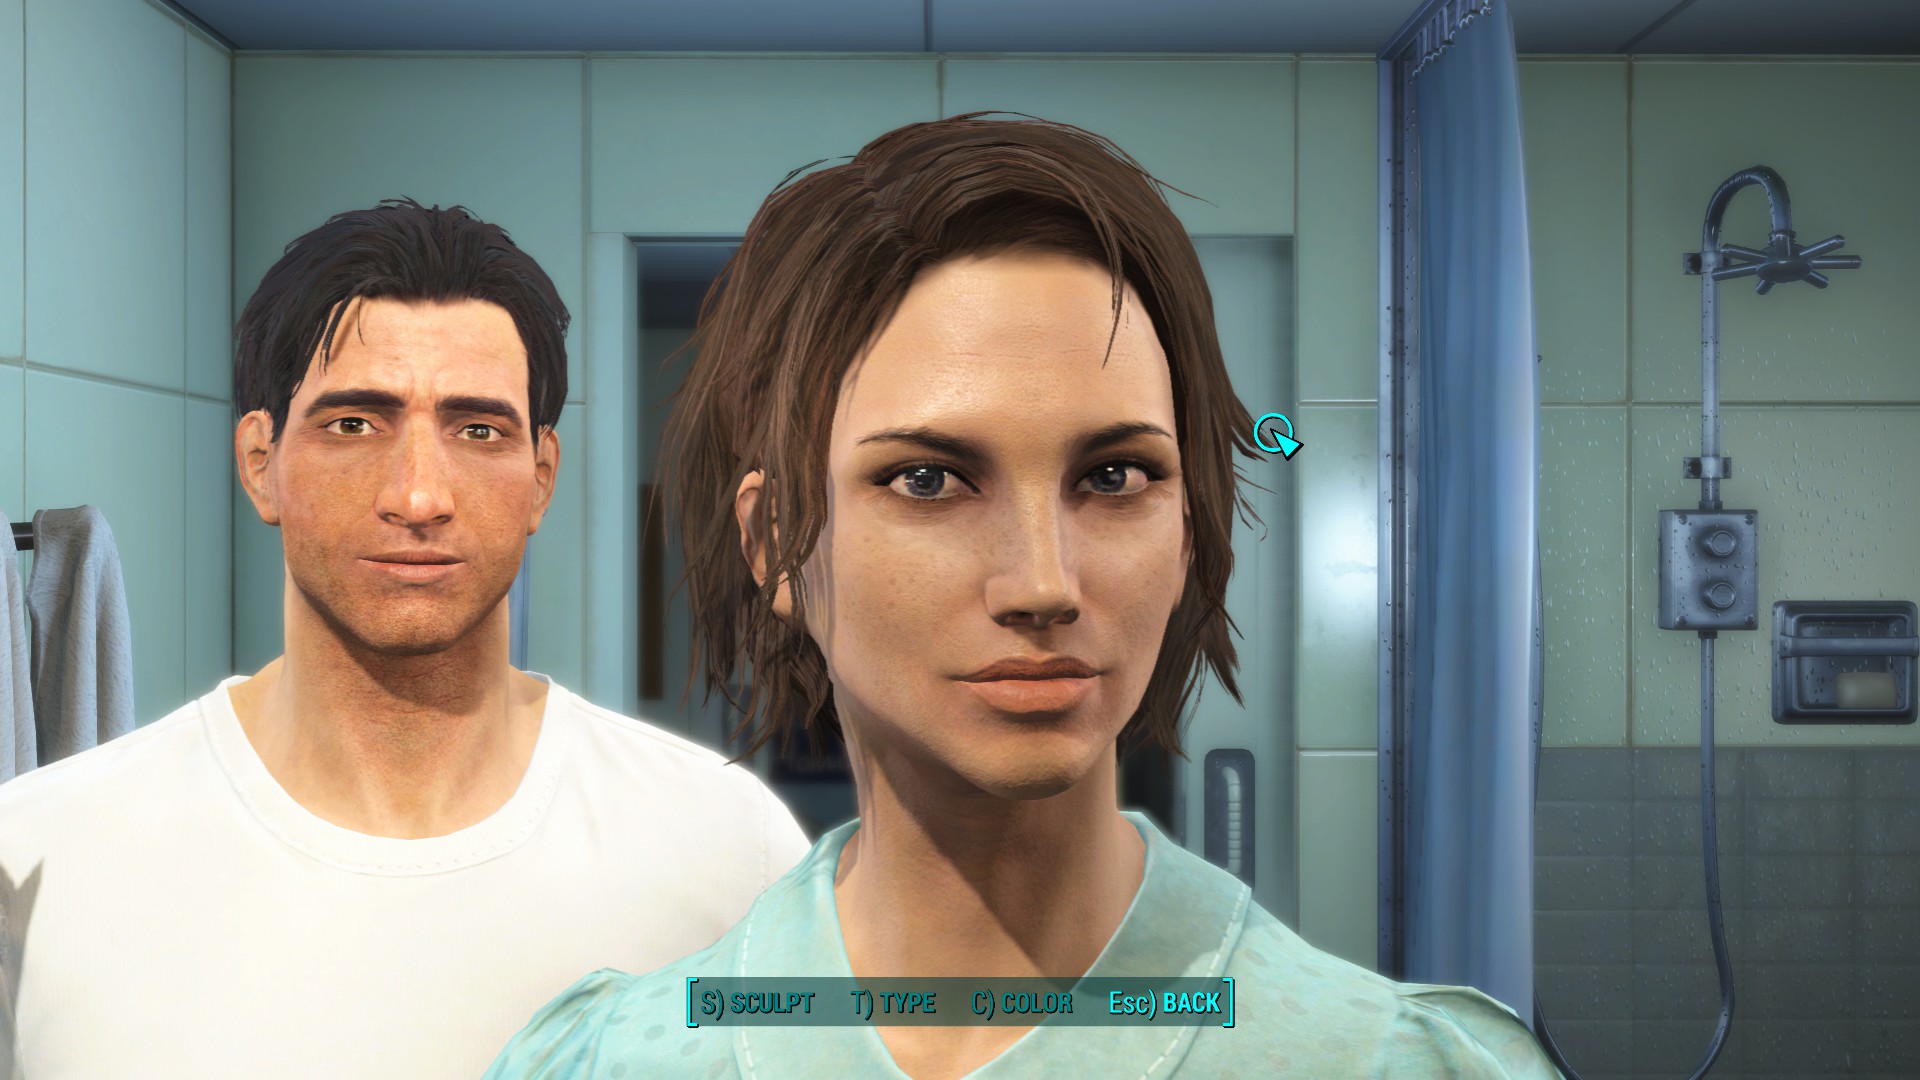
First, you’ll want to choose a hair and skin color since a lot of your other choices will be influenced by those. You can go ahead a choose an eye color to match as well. You’ll also want to have a desired hairstyle in mind, but I recommend starting out with a short style so you can see as much of the face as possible while you are working, and then you can go back and change it at the end.
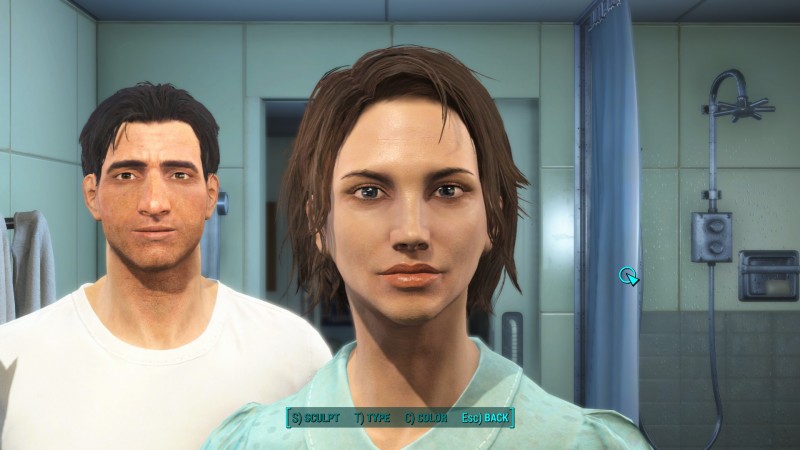
In the above picture, the only changes I have made from the original preset (aside from removing makeup and other markings) are hairstyle, hair color, skin color, and eye color. You can already see a huge difference.
(Note: The above image has all of the features I used for my character, but without any sculpting done.)
As you move your mouse over your character’s face, you will notice that you can drag and shape just about anything you want, but before you do that, you will want to select the styles of features you want to work with first. Features you can choose this way include eyes, eyebrows, nose, mouth, and ears. You can also select textures for your forehead, cheeks, and neck, but more on that later.
The eyes are probably one of the most defining characteristics of the face you are creating, so that is a good place to start. There are numerous options available, and if anything looks too large or like it is set at a weird position, remember that you can change that after you pick the eyes you want. After that, select the eyes with the Sculpt option and play around with the scale, angle, and position of the eyes. This will take some experimentation to get the look you want. Do the same for the eyebrows.

Once again working from my top-down approach, I move on to the nose next. At this point it is helpful to remember that you can move your character’s head around so you can see her profile. You may discover that your character looks great straight-on but weird from the side.
Work on the nose the same way as with the eyes. Choose a style, then tweak the scale, angle, and position to your liking. Be sure not to work on the main nose sculpting option only. You can also separately work on the nose bridge, tip, and nostrils. I chose the Roman 2 nose style for my character, but it looked ridiculous until I shrank the scale on the nose tip and nostrils and changed the angle and positioning of the bridge.
Now, do the same for the mouth and ears. For my character, I chose a different mouth, changed the lip scale, and turned the mouth corners up slightly.
Your character should now be getting pretty close to your final result. From here, you want to tweak all of the remaining facial features using the Sculpt option.
There are over a dozen facial features that you can alter this way, but some of the most important include the jaw and chin, the cheekbones, and the brow and forehead. For my character, I sharpened the jaw and brought the chin back slightly. I also tweaked the eyebrows so that that weren’t so angled and pulled the cheekbones up and slightly out.
Finally, I chose the skin types for my forehead, cheeks, and neck. You may be tempted into choosing “Smooth” for all of your skin textures, but I found that “Textured” and “Weathered” look better on the forehead and cheeks, respectively.
Now that your facial structure and coloring are all finished, you can move on to some distinguishing features in the Extras menu. This is where you can choose options like makeup, blemishes, damage (scars), and markings.
When it comes to makeup, I’m of the opinion that less is more, especially in a post-apocalyptic nuclear wasteland, but this part of the guide is entirely up to personal preference. The makeup options range from Plain Jane to Glamazon and everything in between.
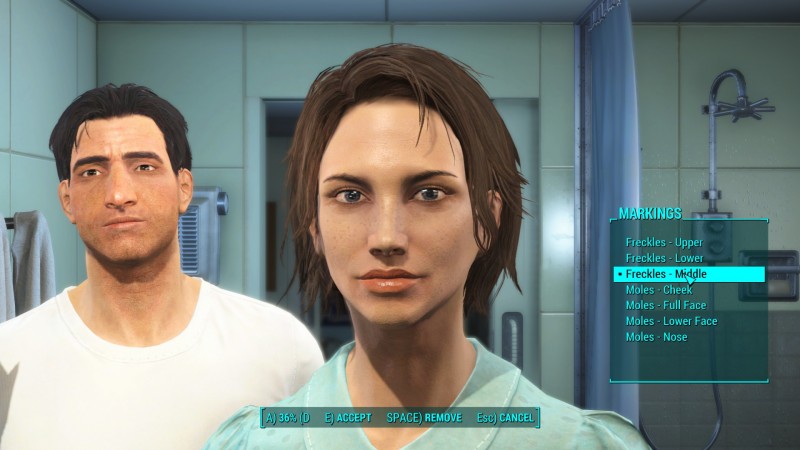
You will notice that in addition to being able to choose color, some options also have an intensity percentage setting. This makes it easier to create more subtle effects. For example, changing the percentage on Freckles – Middle to 36 percent takes you from from horrible acne to a light dusting of freckles across your nose.
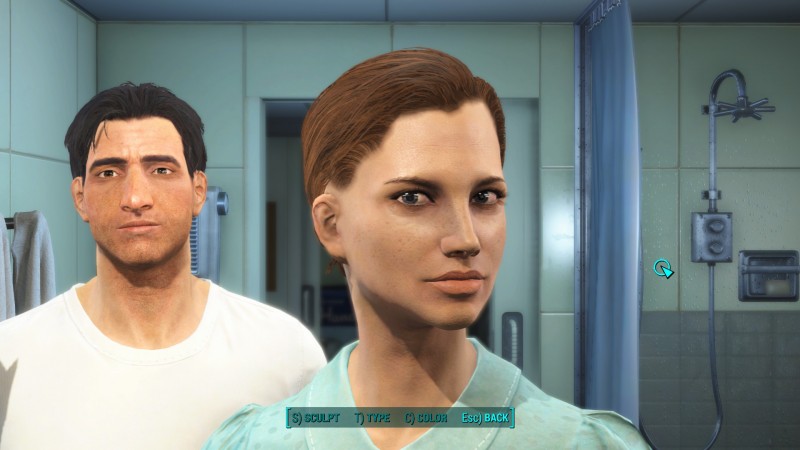
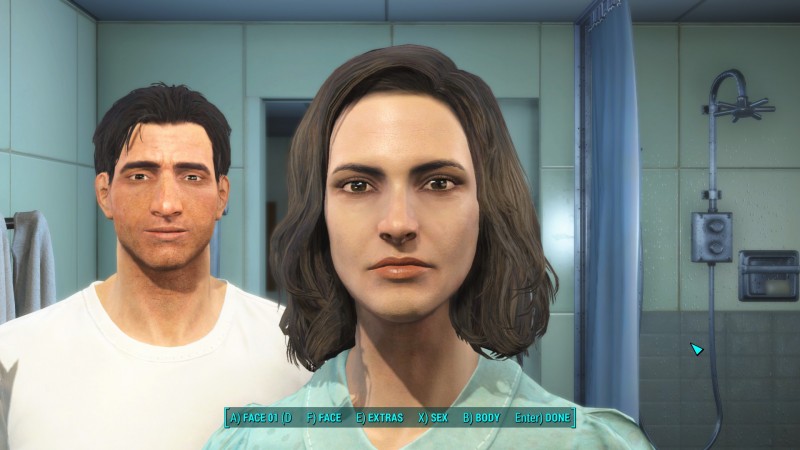
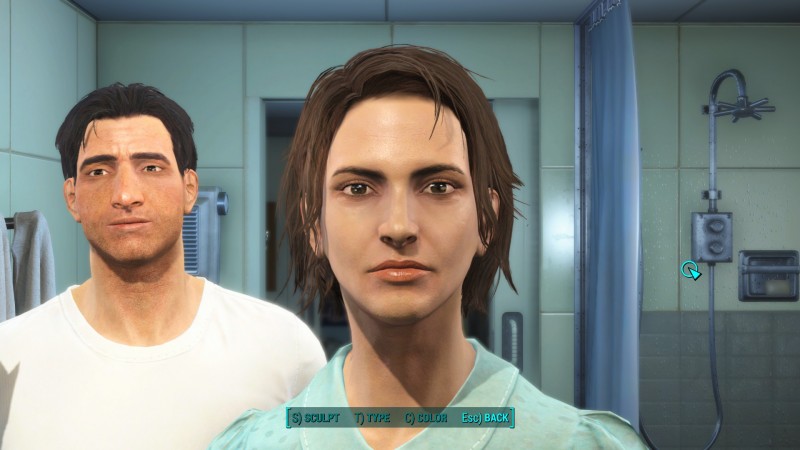
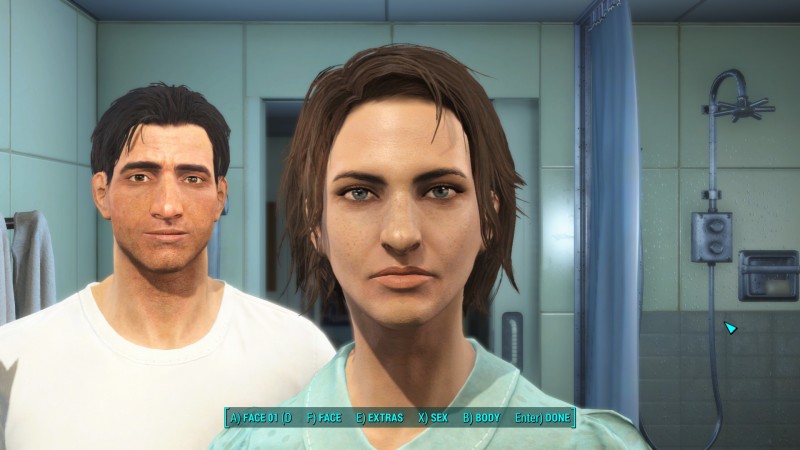
Once you are satisfied, now is the time to return to hairstyle and any other final tweaks you want to make. Simply changing the hairstyle and color can drastically change the appearance of your character, so play around with a few different options to see what you like best. I ended up keeping the “Unscrupulous” hairstyle with the Chestnut Brown color, but the above picture shows how drastically different your character can look just by changing your hair.
Hopefuly you are satisfied with your end result, but if you complete your character creation and suddenly find that you want to change something, don’t worry. There are a few ways you can go back and alter your character.
When you are about to venture out into the wasteland for the first time, you will be given one final chance to change your appearance. Changing your appearance this way is free, but once you leave, you will have to pay someone to change your appearance for you.
Changing your hair is cheap (only 15 caps) and can be done at a few locations, including a barber at the market in Diamond City. Changing your face is a bit more expensive (100 caps) and can be done at a surgeon, which can also be found in Diamond City.
If you are playing on PC, you can change your appearance at any time for free using the console. First, go into third-person view somewhere that is well lit (and safe), then open the console with the ~ key. Next, type in “slm player” and hit enter, then close the console with the ~ key again. You should now be in the character editor. To zoom in on the face, press B to open the body menu, then go back and the camera should reorient itself.
Once you are finished, you may be stuck in third-person and unable to open your menu. To fix this, simply left click to ready your weapon, and it should unstick.

Simply choosing these features won’t get you the character I created, but they will give you a good base to start from.
No other Extras used.
THANK YOU