


 NEWS
NEWS
NEWS
NEWS
NEWS
AirDrop allows you to share various items, including photos, videos, contacts and more to nearby Apple users. AirDrop uses Bluetooth and Wi-Fi to quickly and securely transfer content between iPhones, iPads, and Macs.
To transfer content, both the sender and recipient need iOS 7 or later or a Mac with OS X Yosemite or later. AirPlay is available on the iPhone 5 or later, iPad Pro, iPad (4th generation or later), iPad mini or later, and iPod touch (5th generation or later). While your Mac needs to be a 2012 model, or newer.
We look at how to turn on AirDrop and how you can send and receive files on iPhone, iPad and Mac.
 How to turn on AirDrop on iPhone, iPad and Mac
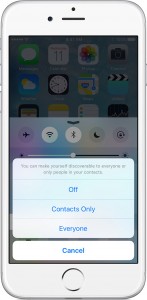
On an iPhone, iPad: Open the Control Center > activate both Bluetooth and Wi-Fi (you don’t have to be on a Wi-Fi network, but it has to be On for the transfer to be possible) > tap AirDrop > select one of three visibility options: the Contacts Only option will allow only your contacts to see your device; the Everyone option will make your device visible to all nearby iOS users using AirDrop. While the Off option will disable AirDrop.
On a Mac: In the menu bar in the Finder, select Go > AirDrop. If Bluetooth or Wi-Fi is not turned on you will see a button to turn it on. If you want to be visible to everyone, and not only your Contacts, there is an ‘Allow me to be discovered by’ option at the bottom of the AirDrop window.
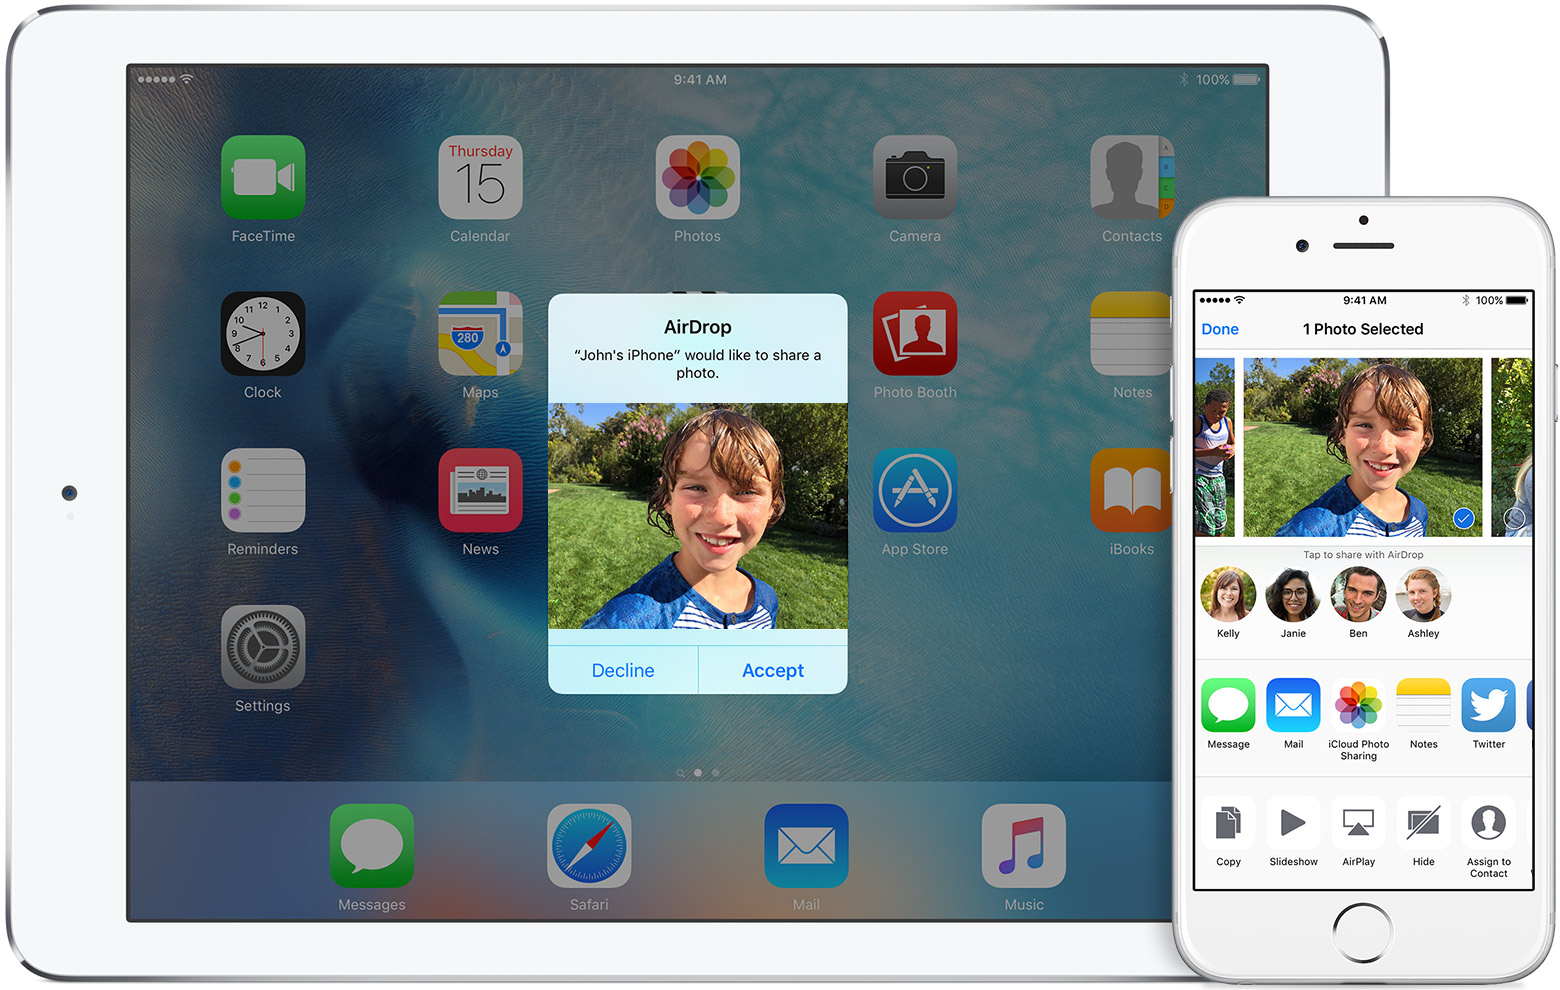
AirDrop allows you to share content from various apps including Photos, Contacts, Safari and more.
On an iPhone, iPad: Tap the content you want to share > tap the Share button > tap the name of a nearby AirDrop user or the Apple device.
Tip: If you chose the visibility option of Contacts Only and can’t find a nearby user, make sure both of you are signed into iCloud.
On a Mac: Choose Go > AirDrop (you can also select AirDrop in the Finder window’s sidebar). In the AirDrop window, you will see all the nearby AirDrop users. Drag your items to share to the recipient’s image in the AirDrop window > click Send.

Alternatively, use the share feature > click the Share button, if available (or Control-click an item in the Finder > Share). Select AirDrop from the Share menu > select a recipient from the AirDrop sheet > click Done.
If an item is shared with you using AirDrop you will receive a notification with a preview of the content being shared and who is sending it. You can then choose to accept or decline the AirDrop.
For iPhone, iPad users: If you accept, the content will be saved in the app that it was sent from. So photos will be saved in the Photos app, websites will open in Safari, etc.
For Mac users: If you accept, the content is saved to the Downloads folder. The content is automatically accepted and saved when the recipient is signed into your iCloud account.
Sources: Apple Support: iPhone; Apple Support: Mac
Support our mission to keep content open and free by engaging with theCUBE community. Join theCUBE’s Alumni Trust Network, where technology leaders connect, share intelligence and create opportunities.
Founded by tech visionaries John Furrier and Dave Vellante, SiliconANGLE Media has built a dynamic ecosystem of industry-leading digital media brands that reach 15+ million elite tech professionals. Our new proprietary theCUBE AI Video Cloud is breaking ground in audience interaction, leveraging theCUBEai.com neural network to help technology companies make data-driven decisions and stay at the forefront of industry conversations.